
The Pagefile is one of the most established and most imperative elements in Windows. It goes about as a virtual memory on your Windows framework. At whatever point your machine is low on memory, Windows moves the slightest utilized memory pages to a shrouded document called pagefile. Naturally, the pagefile is consequently made and kept up by Windows itself. This empowers Windows to run programs as it ought to without smashing them because of low memory. Regardless of the possibility that you have a lot of memory, Windows still uses the pagefile for reserving while moving or erasing a lot of records and for different exercises.
As the vast majority of you know, at whatever point you close down your framework, the substance of the memory (RAM) are naturally lost because of the loss of force. Be that as it may, with regards to the pagefile, the substance remains in place unless Windows evacuates them. This makes it workable for others to test for information in the pagefile. On the off chance that you don't need this to happen, you can constrain Windows to consequently clear the pagefile each time you close down Windows.
How Windows Clears the Pagefile
When you make Windows naturally clear the pagefile with each shutdown, it will really overwrite the current pagefile information with "zeros." This makes it close difficult to recoup information from the pagefile. Notwithstanding, as a result of the revamping procedure, an ideal opportunity to close down your framework may increment.
Using Windows Group Policy Editor
In the event that you are utilizing the Pro or Enterprise variant of Windows, then you can utilize the Group Policy Editor to clear the pagefile consequently. To begin, scan for "gpedit.msc" in the Start menu and open it.

The above action will open the Group Policy Editor. Here, navigate to “Computer Configuration -> Windows Settings -> Security Settings -> Local Policies -> Security Options” on the left panel.

On the right panel, find and double-click on the “Shutdown: Clear virtual memory page file” policy.

In the policy settings window, select the “Enabled” radio option, and then click on the “OK” button to save the changes.

Then just restart your system to make the changes take effect and you are good to go. If you ever want to revert back, simply select the “Disabled” radio option in the policy settings window.
Using Windows Registry Editor
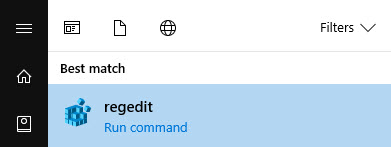
If you are using the Home version of Windows, then you have no choice but to use the Windows Registry to clear the pagefile. To do that, search for regedit in the Start menu and open it.
Once the Registry Editor has been opened, navigate to the following key on the left pane:

Here we need to create a new value. To do that, right-click on the right panel and select the option “New > DWORD (32-bit) Value.”

Now, name the new value as “ClearPageFileAtShutdown” and press the Enter button.

After creating the value, double-click on it to open the value properties window. Here, enter “1” as the new Value Data, and click on the “OK” button to save the changes.

This is how it looks once you are done with the changes.

Restart your system to make sure the changes take effect. From this point forward, whenever you shut down your system, Windows will automatically clear the pagefile.
In the future to revert back, simply change the value data back to “0” and you are good to go.
Do comment below sharing your thoughts and experiences about using the above method to automatically clear the pagefile in Windows with every shutdown.
(source: maketecheasier.com)
EmoticonEmoticon